Initiate Withdraw
Before withdrawing, user needs to initiate withdraw to lock the RAZOR amount that needs to be withdraw.
Step 1
Visit https://v1.razorscan.io/
Note: We recommend that all Delegators bookmark this specific URL to prevent any phishing attacks.
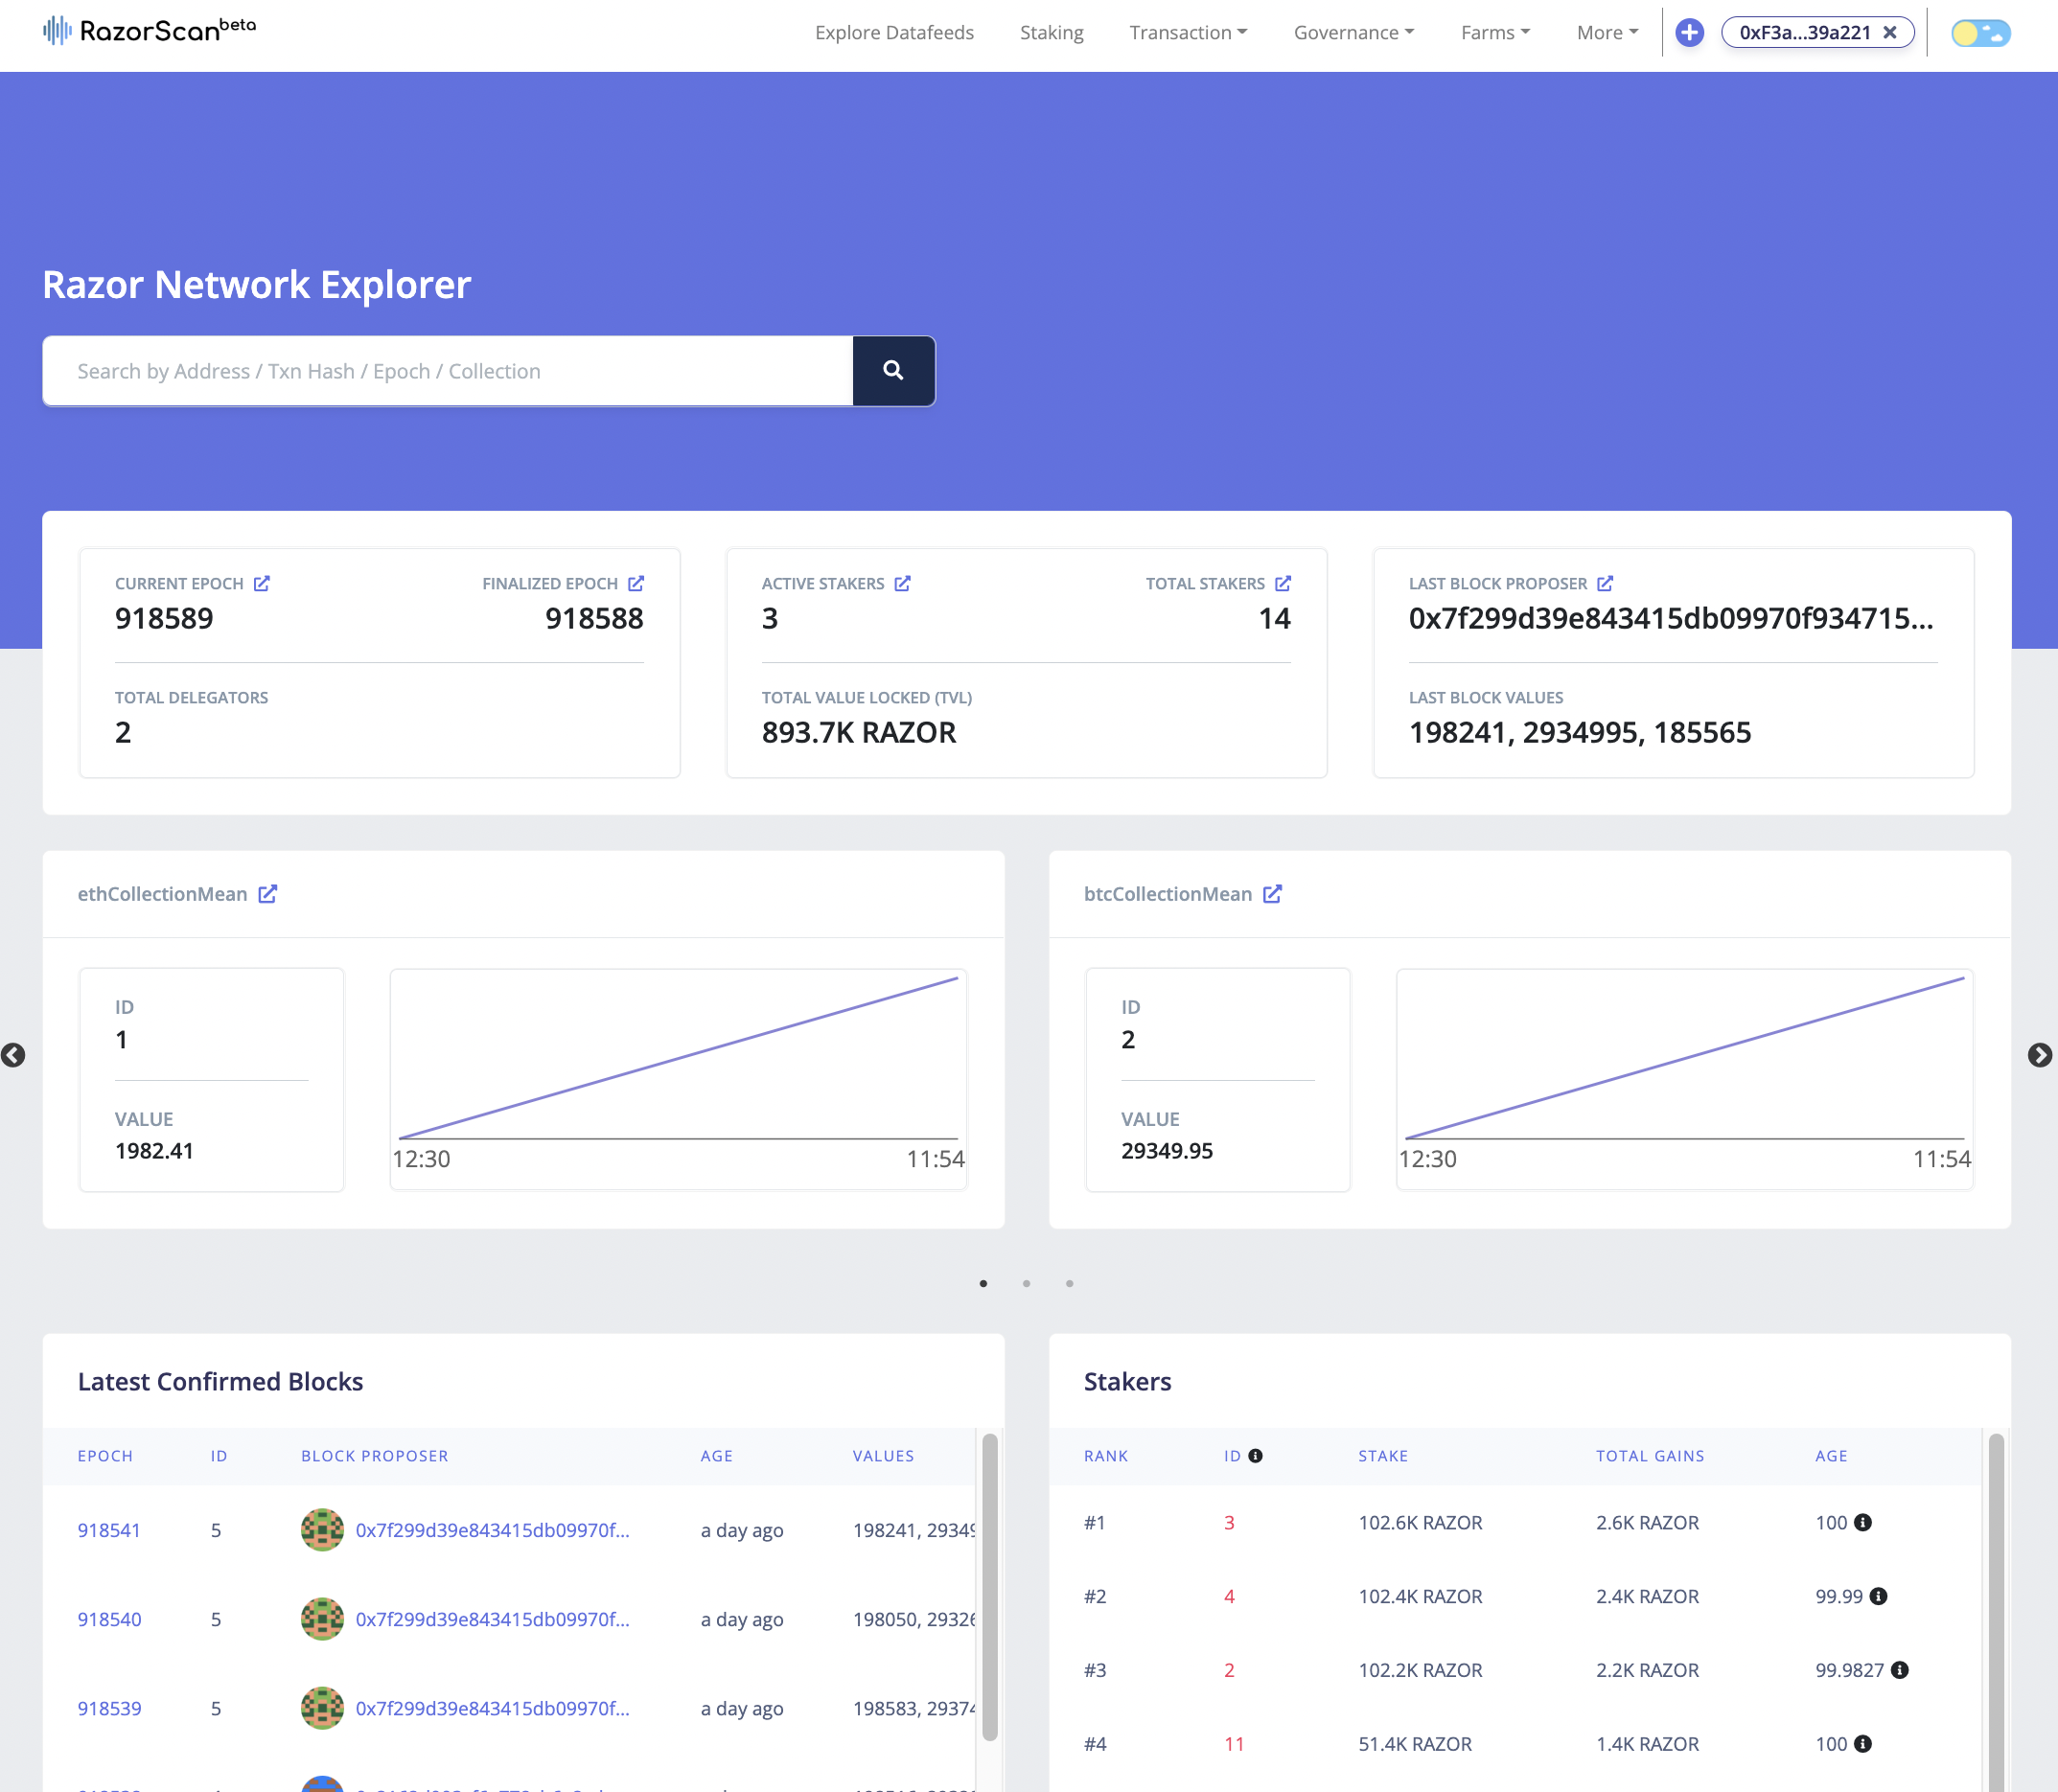
Step 2
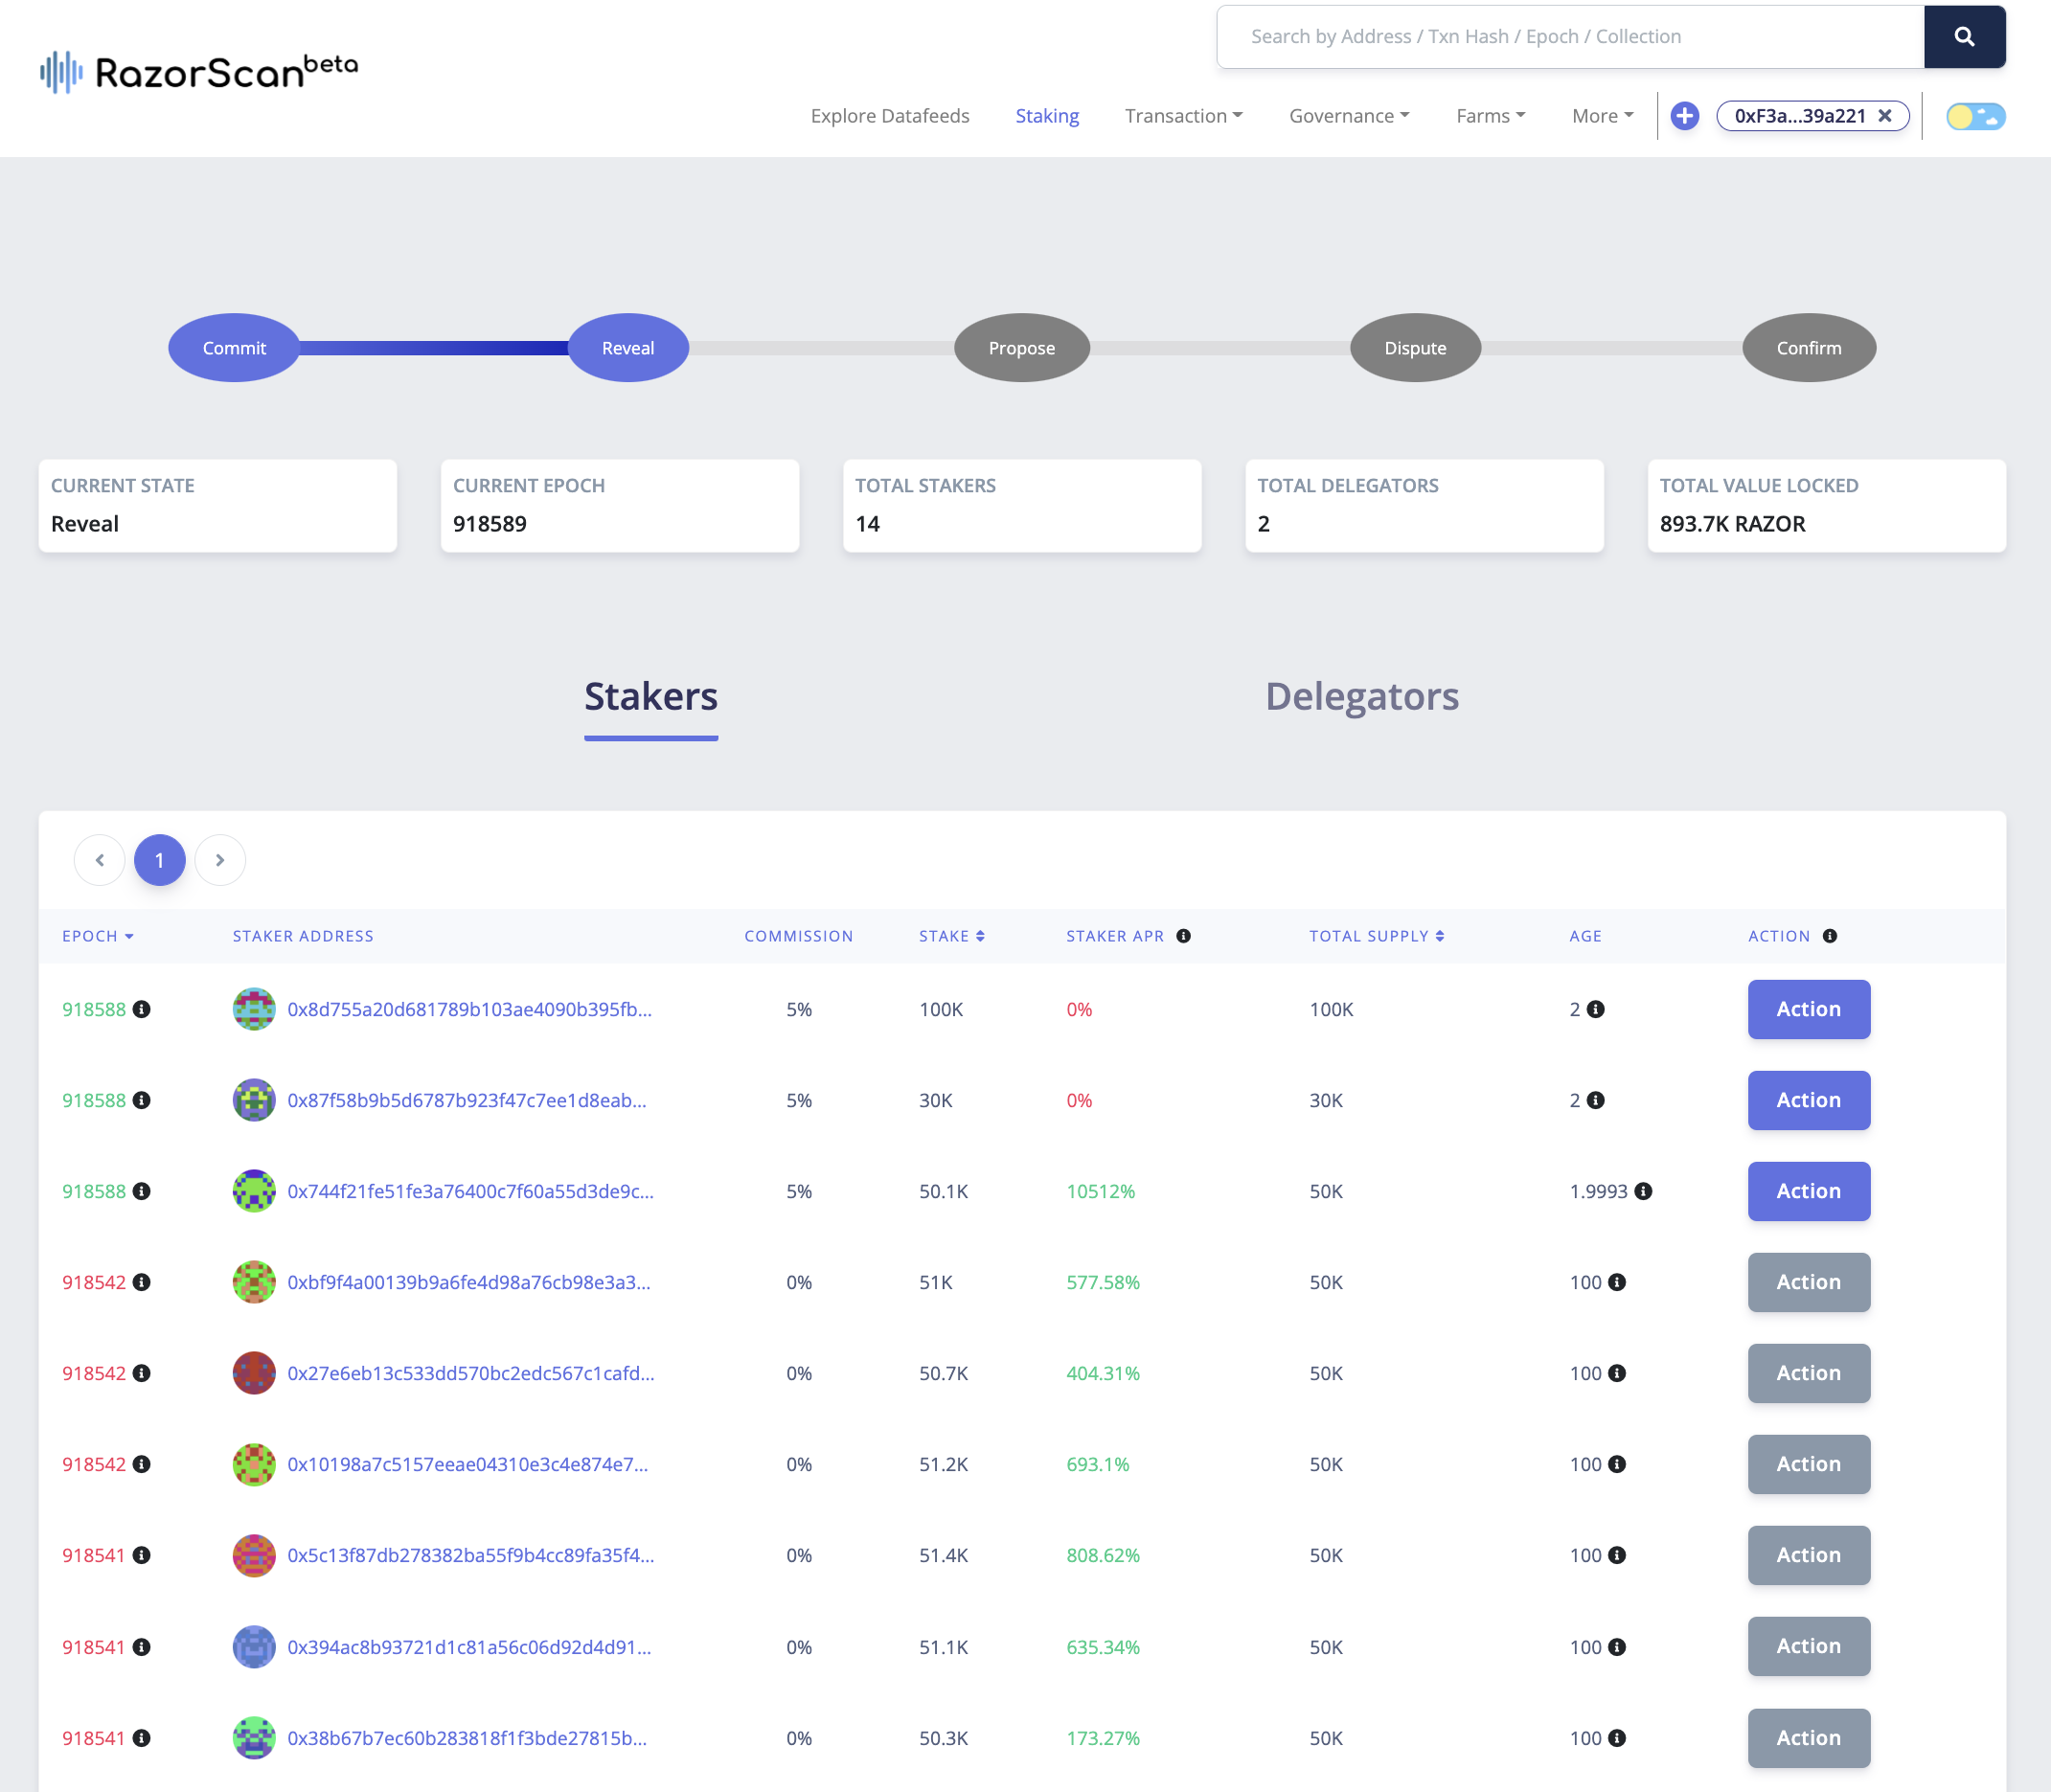
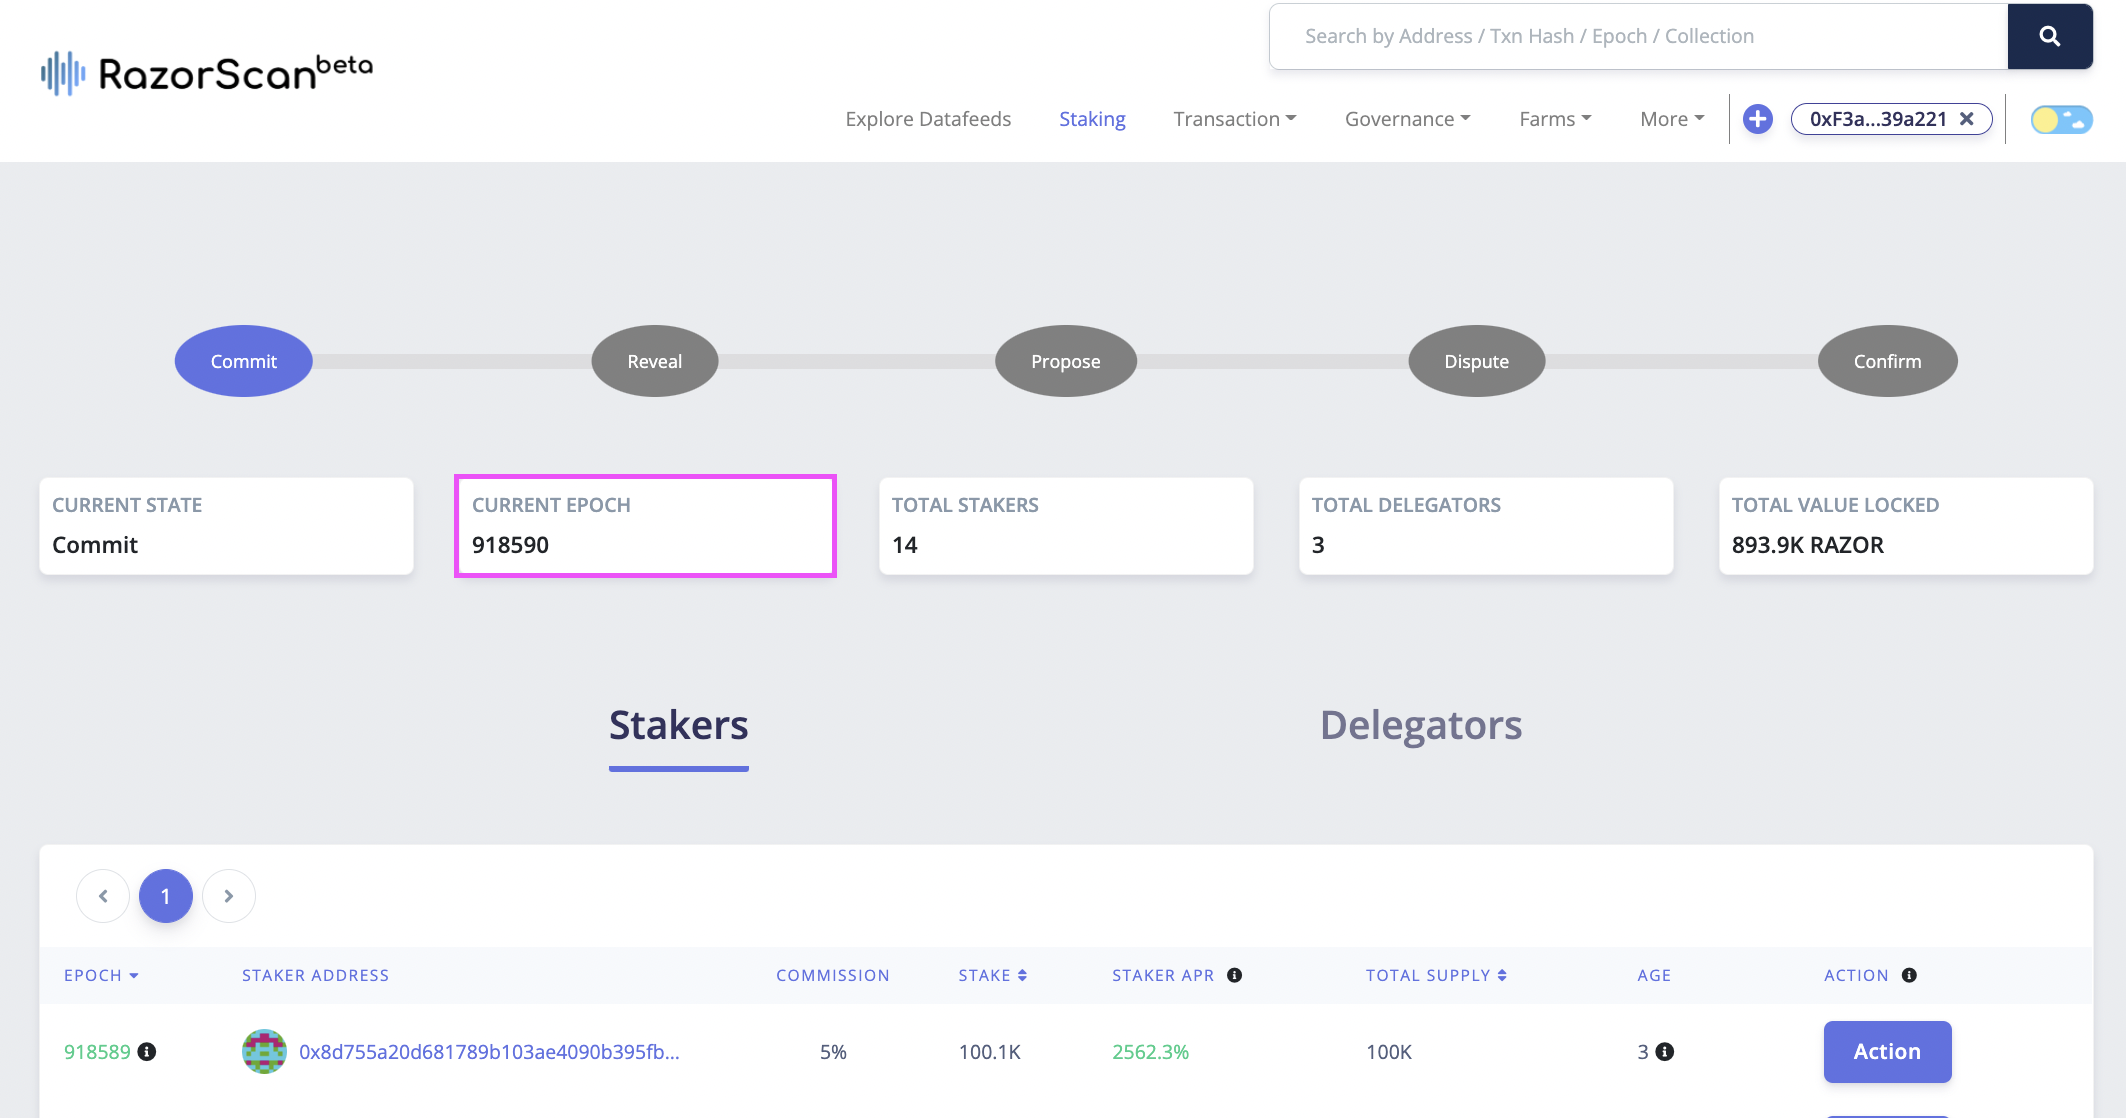
Now, click on “Connect Wallet” from the top right corner and make sure your network is set to "Razor Schain". Next, visit https://v1.razorscan.io/staking or click on “Staking” from the menu bar on the header and you should see the screen below:
Step 3
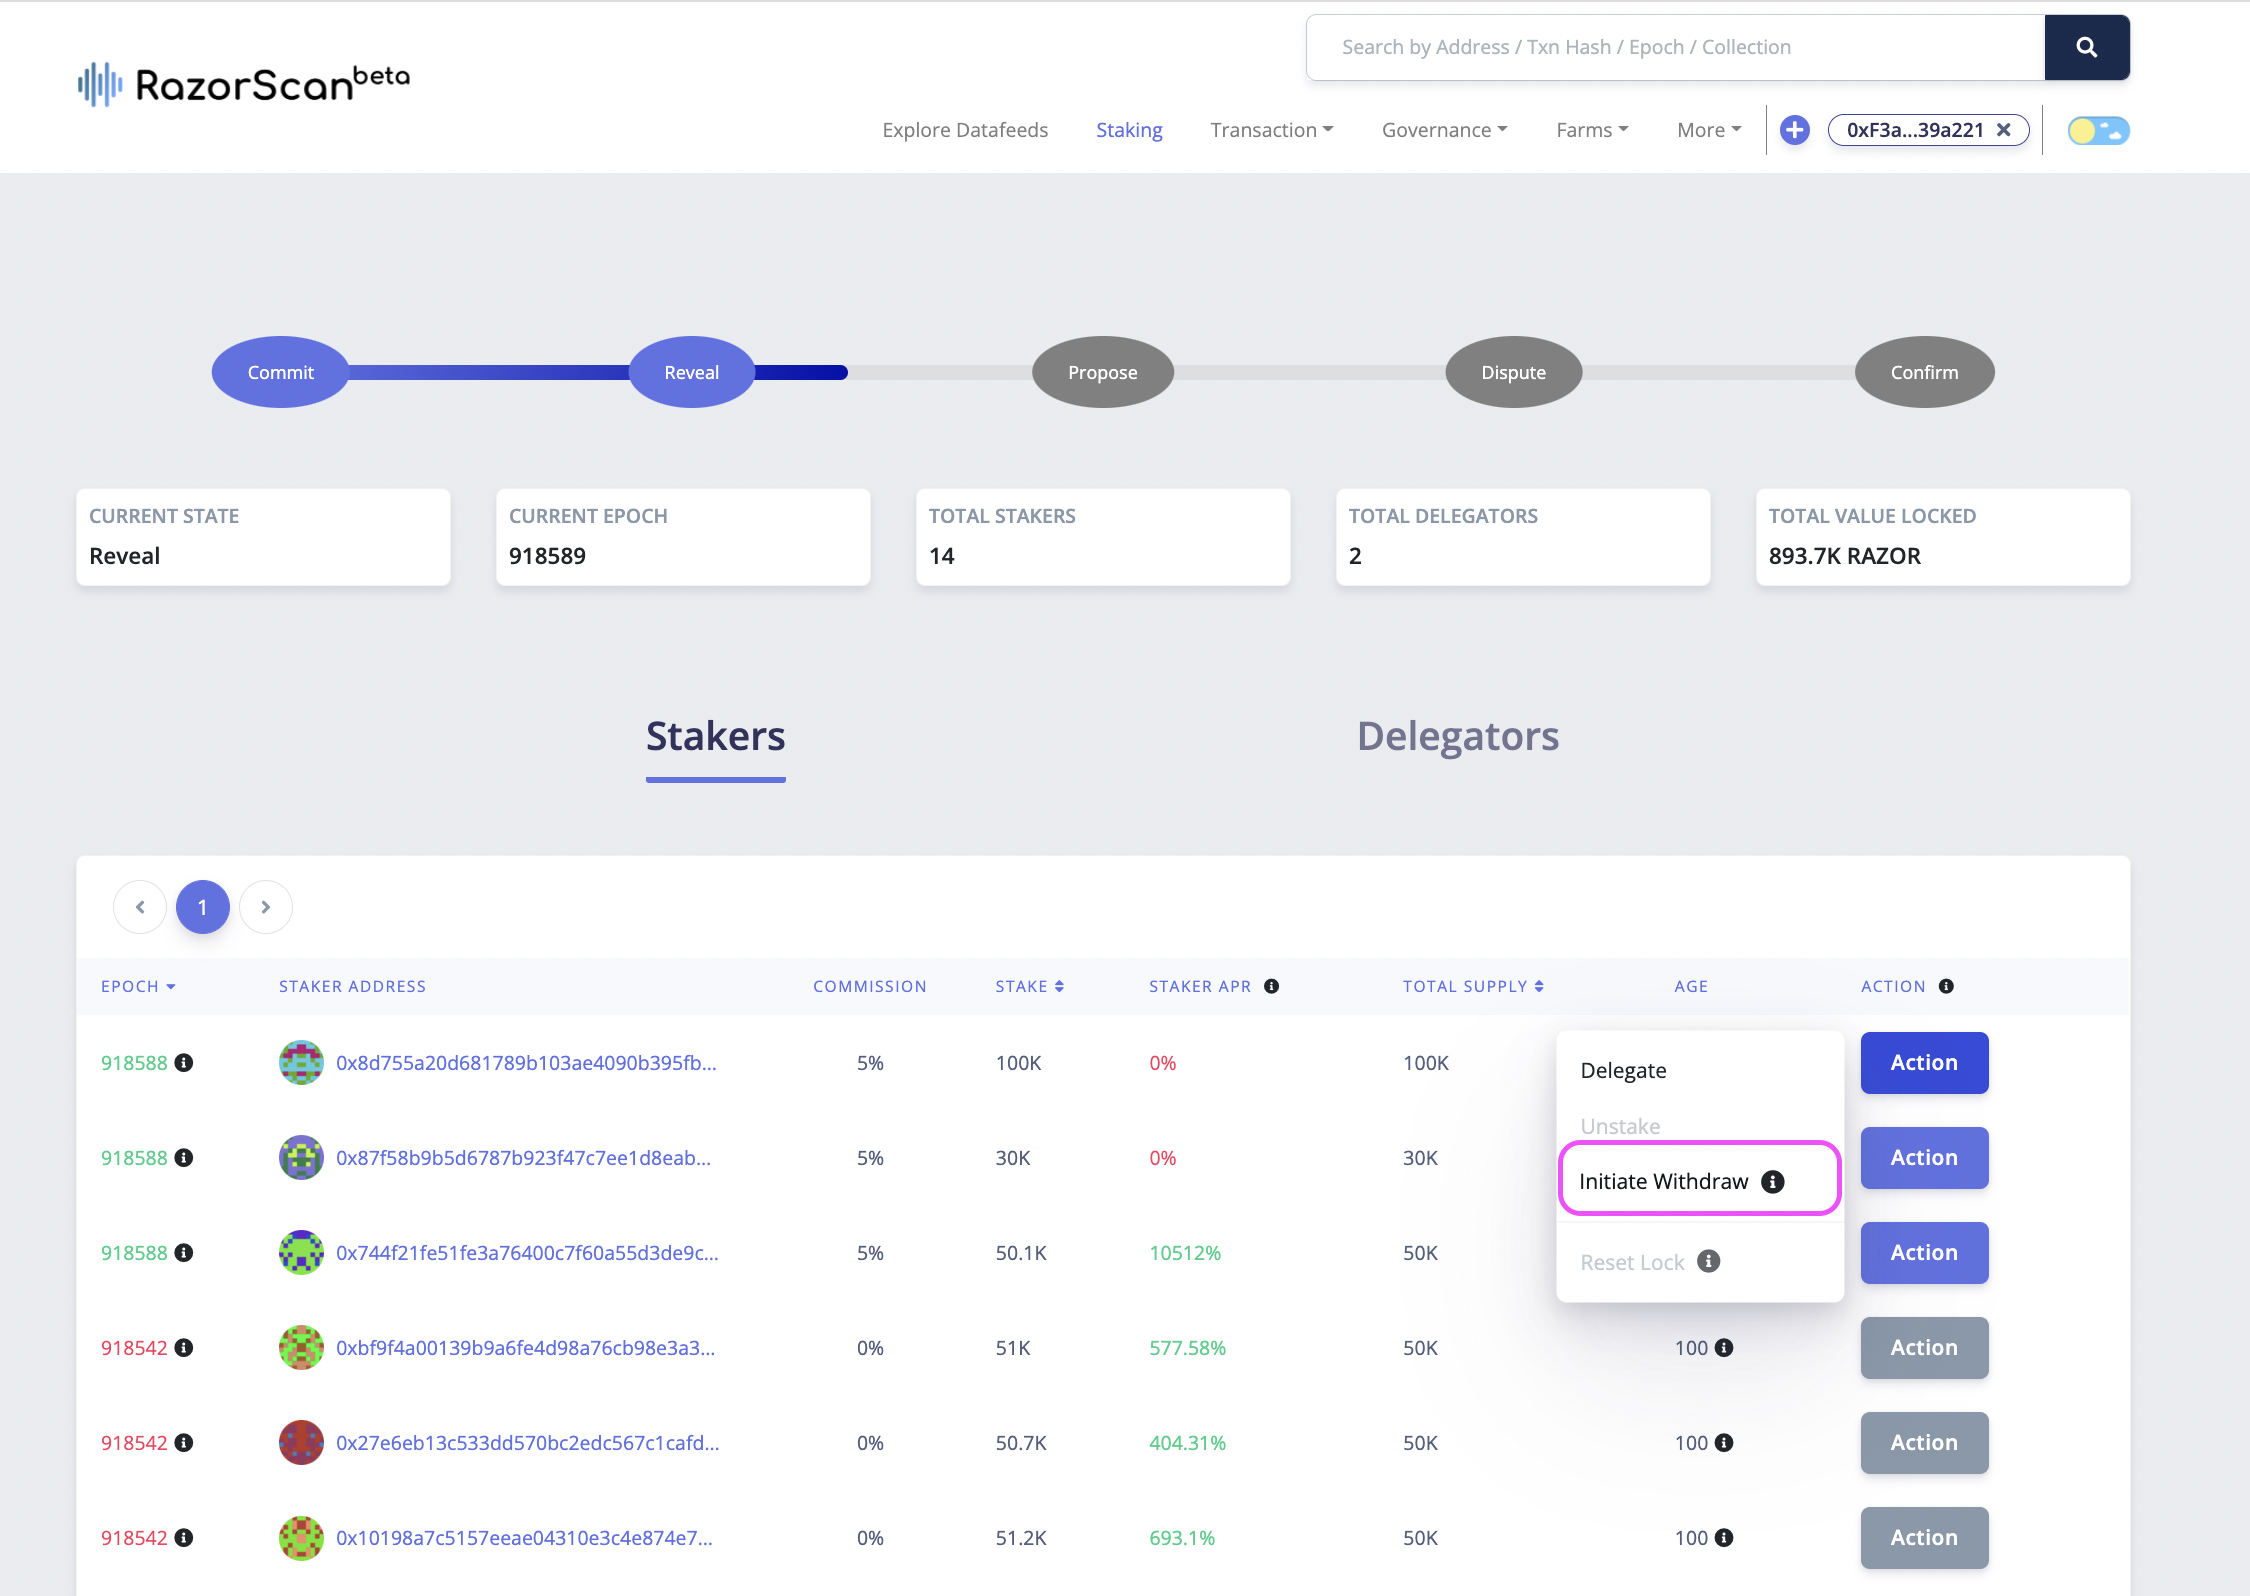
Find the staker address in the Stakers table, click on Actions and now if the connected address has an unstake lock active, Initiate Withdraw will be allowed. It will also have a tooltip which specifies the epochs that it is to be called within. Note: This can also be done from the particular staker or delegator page.
Step 4
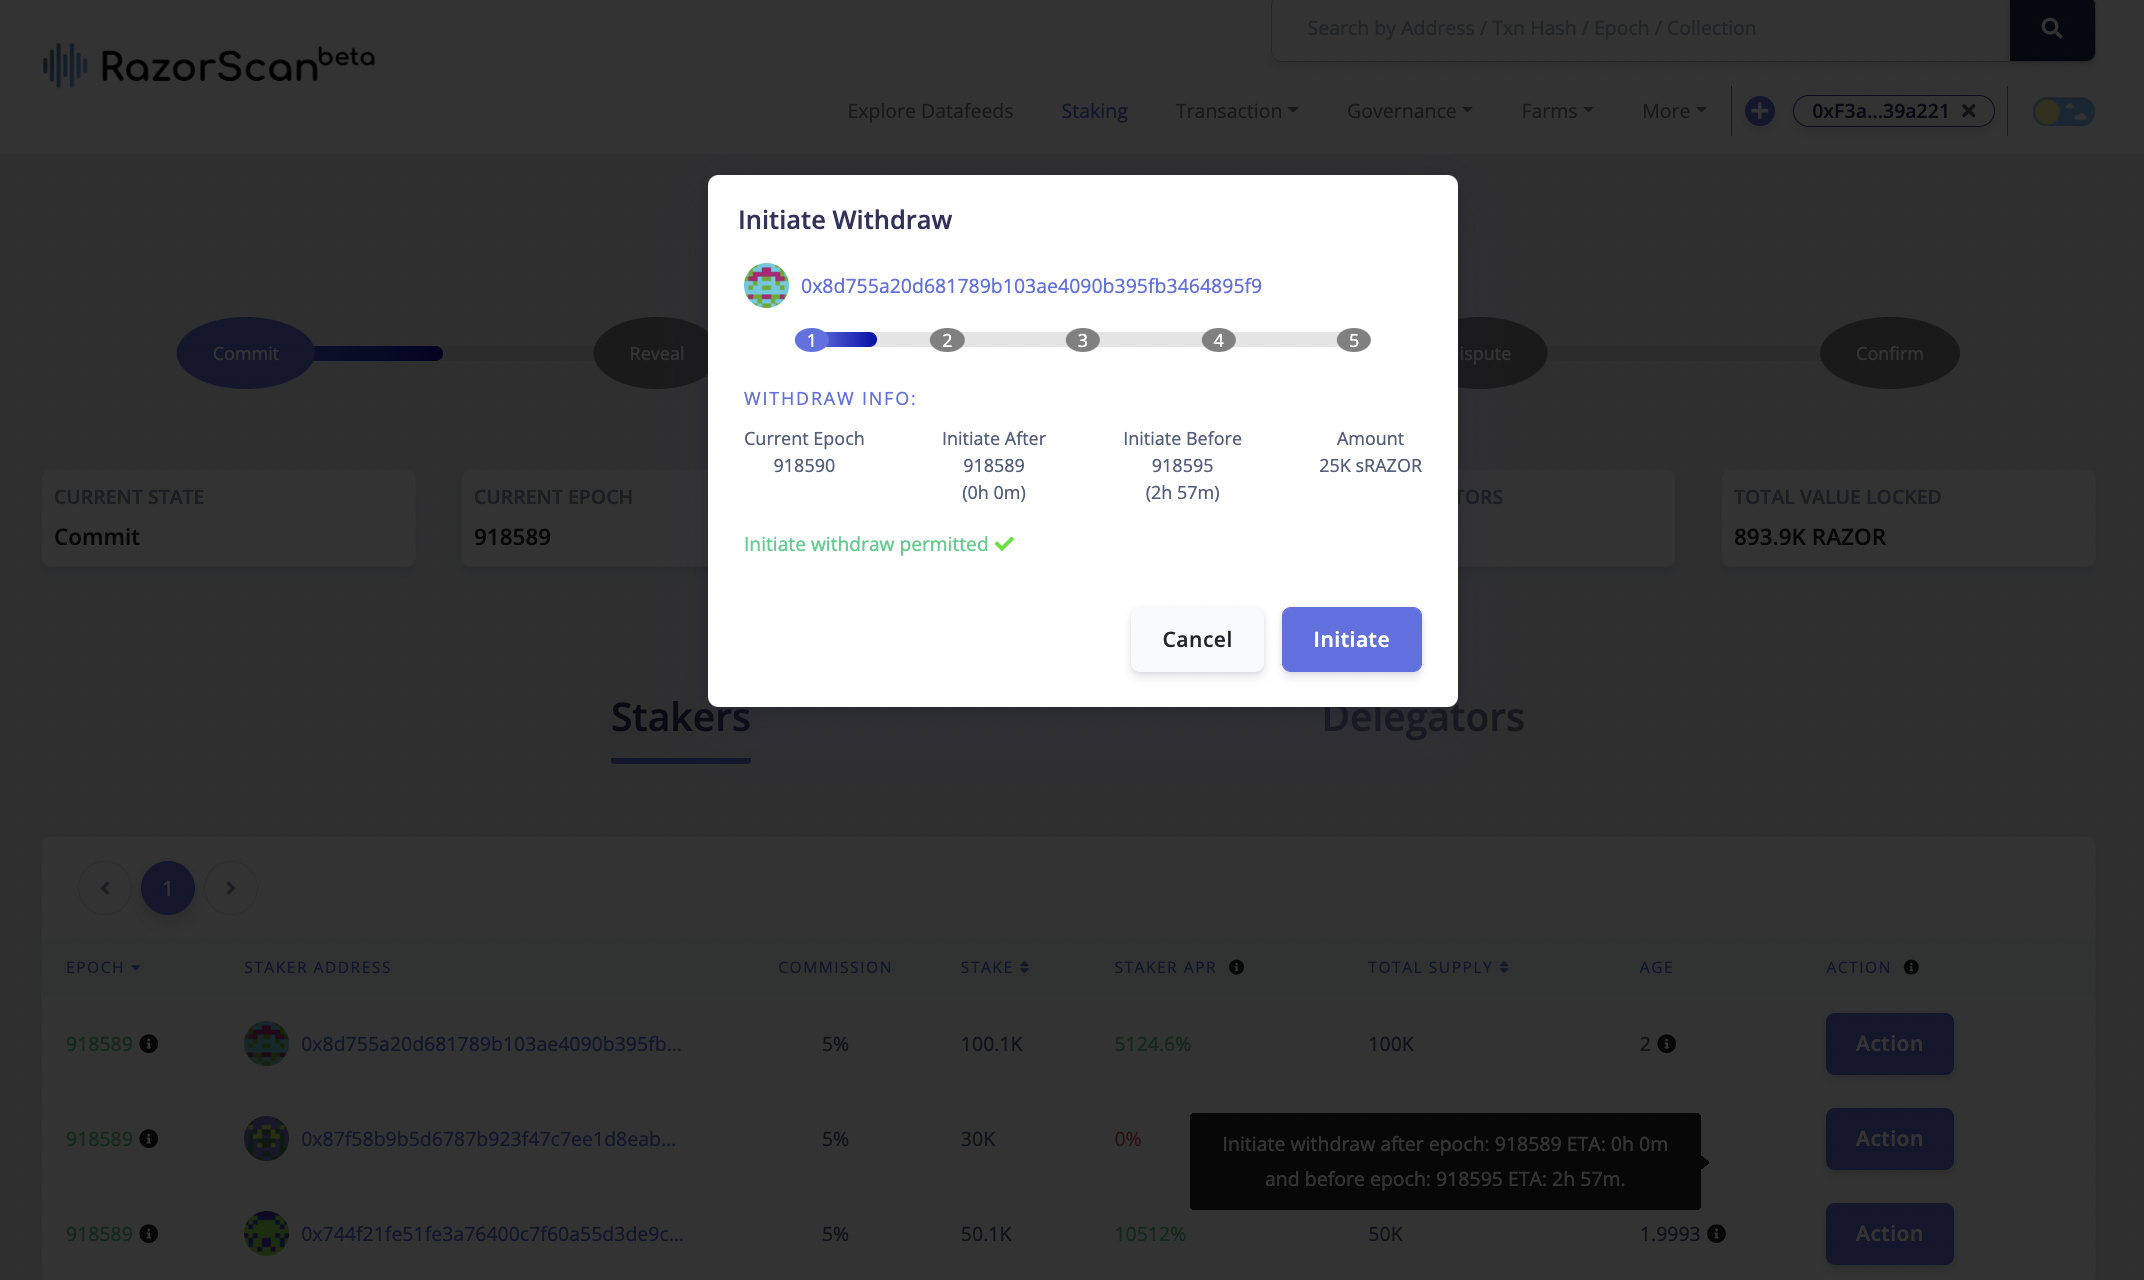
A modal will show, with the corresponding Unstake Lock details. Use the state bar to make sure the current state is not Propose or Dispute and click the “Initiate” button and confirm the transaction.
Note: Refer to the state bar to get the current state and an ETA for the next state.
Step 5
Once the transaction is successful, Withdraw will need to be called after T + withdrawLockPeriod epoch. Consider T as epoch in which initiate withdraw was called.
Note: To get the exact values of the lock periods check Governance here.